Run and check your exercise
Before the exercise goes to players, run it and check it like a player: click, drag, connect. The editor first checks by itself whether the exercise is complete, and only then runs it.
Before you start: an exercise with at least one element on the scene is open in the editor.
Check the exercise before you run it
-
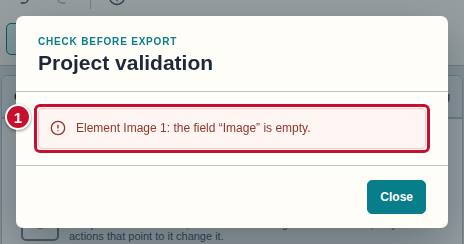
Look at the toolbar. The red button with an exclamation mark and a number (marker 1) tells you how many problems the exercise has. In the screenshot there is one problem: an Image that has no file chosen.

-
Click this button. The Project validation window opens with the list of problems (marker 1). Every row begins with the name of the element it is about and says what is missing — in the screenshot: “Element Image 1: the field “Image” is empty.”
-
Click the row with the problem. The window closes and the editor selects the element the problem is about, so you immediately see its settings in the Inspector panel. A problem with the exercise as a whole, for example a name without letters, opens the Exercise configuration window instead.
-
Fix what the message points to. In the screenshot you need to choose a file for the Image, as on the page Add an Image to the scene.
-
Check the counter on the toolbar. When you have fixed everything, it shows 0.
-
Click the counter again. The Project validation window now says: “The project is ready for export.” (marker 1). The exercise is ready to run and export.
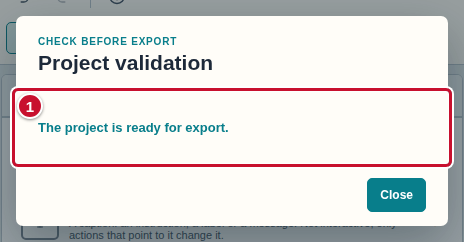
The window can also show remarks that are less important than errors; each one begins with the word “Warning:”. Warnings do not block the export or “Run”.
When the exercise has several languages, the window also reports what is missing in a language: a text that has not been translated (the row names the language) or an image asset that has no file for one of the languages. Clicking such a row takes you to the missing tab or to the missing file in the library. How to fill them in is described on the pages Make an exercise in several languages and Add an image in language versions.
Run the exercise
-
On the toolbar, click Run (marker 1). The editor sends the exercise to the engine: at the bottom of the scene you first see “Sending the exercise to the engine...” and after a moment “The exercise was started in the engine”.

-
A new browser tab opens. For a moment it shows the message “Sending the exercise to the engine…”, and then GS Engine with your exercise. The scene is fitted to the window of the tab, so there may be empty strips around it. Do what a player would do: click the elements or drag them.
-
Go back to the editor tab. After every change in the exercise, click Run again — the engine then gets the current version and shows it in the same tab.
The window of the running exercise is a separate GS Engine tab, not a part of the editor, so it is not in the screenshots of this page.
Run the exercise in another language
When the exercise has more than one language, Run runs it in the language chosen on the bar of the Scene panel (small buttons with language codes, for example pl and en). The hint that appears when you point at a switch says that it shows the scene and runs the exercise in that language.
- On the bar of the Scene panel, click the switch of the language in which you want to see the exercise, for example en.
- On the toolbar, click Run. The new tab shows the texts and images in that language.
- To see another language, go back to the editor tab, click another switch and Run again.
Details and screenshots: Run the exercise in the chosen language.
When running does not work
- The Project validation window opens by itself, and the message “Fix the validation problems before running” is at the bottom of the scene. The exercise has problems. Fix them as described in the section Check the exercise before you run it.
- The message “The browser blocked the engine tab — allow pop-ups for the editor.”. Your browser did not let the editor open a new tab. Allow pop-ups for the editor's page and click Run again.
- The message “The exercise could not be run” with a reason. The editor could not connect to the server that runs exercises, or the server reported an error. Try again in a moment; if it still does not work, save the exercise as a ZIP (Save the exercise as a ZIP) and report the problem to the person who provides the editor.
- The message “The exercise changed while it was being started — click “Run” again.”. This happens rarely, when the asset libraries change while the editor is preparing the run. Click Run again.
Common mistakes
- The Run button does not open a tab with the exercise. Usually the toolbar then shows a number of problems greater than 0 — fix them (section Check the exercise before you run it).
- The exercise runs, but the elements do not react. The Component has the behavior None. Set it as described on the page Set a Component's behavior.
- The exercise started in a different language than I wanted. The engine tab starts in the language chosen on the stage bar at the moment you click Run. Choose the right switch and run it again.
- The exercise changed, but the engine tab shows the old one. The engine tab does not refresh by itself after changes in the editor. Click Run again.