Start a new exercise
Every piece of work in GS Editor starts with a new exercise. On this page you create an empty exercise, see what the parts of the editor window are for, give the exercise a name and set its languages.
Create a new exercise
-
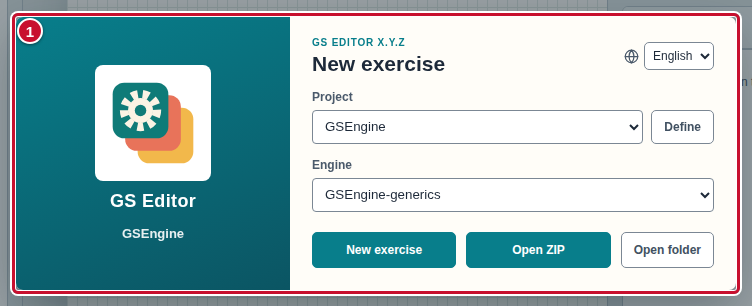
Open GS Editor in your browser. The first time, you see the start window with the heading New exercise (marker 1 surrounds the whole window in the screenshot).
-
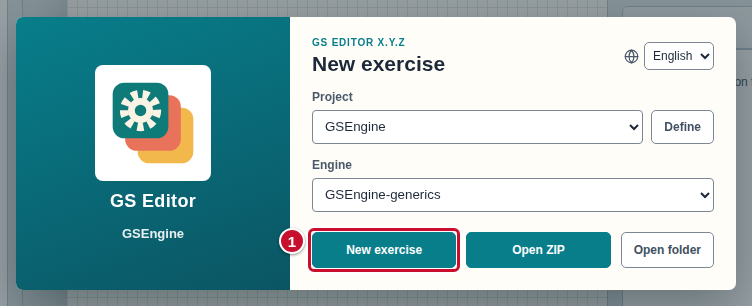
Click New exercise (marker 1). The start window disappears and the editor shows an empty exercise. At the bottom of the scene, the message “New exercise created” appears.
-
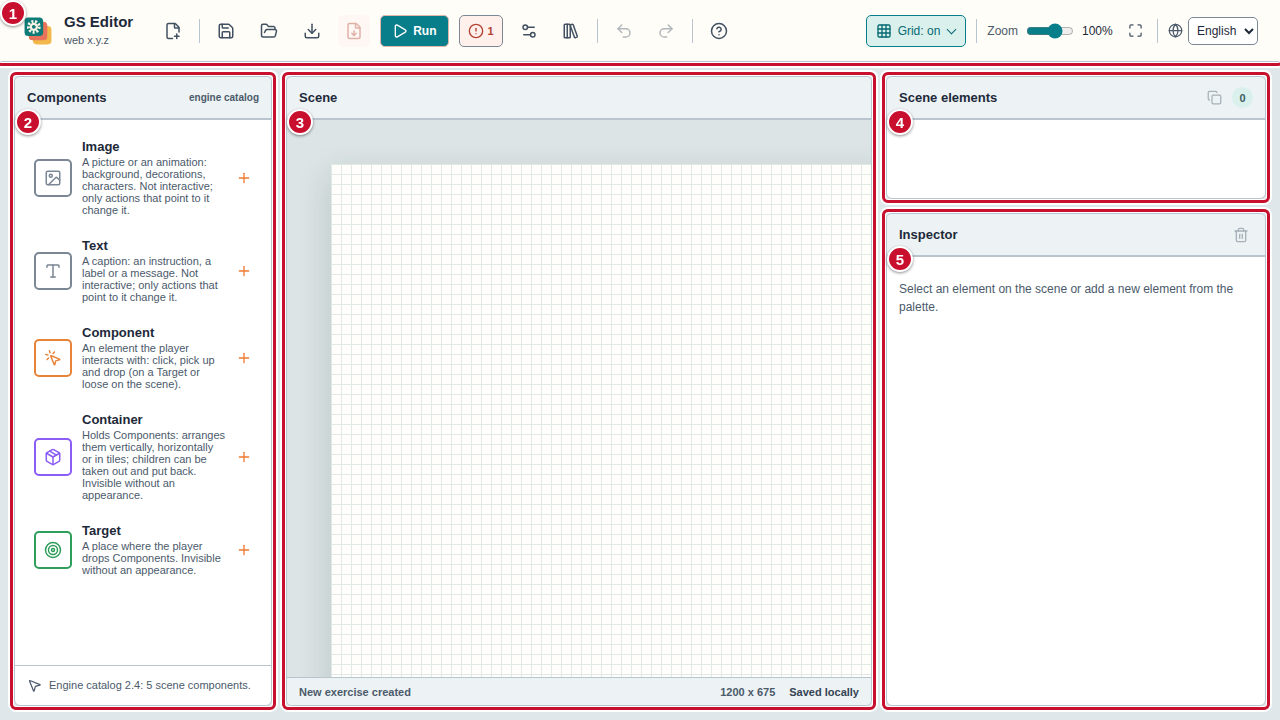
Look around the editor window. The screenshot marks its main parts:
- marker 1 — the toolbar with buttons (save, run, undo). The red button with the number 1 is the problem counter: it shows 1 because the exercise has no elements yet (“The exercise has no elements — add an element from the palette.”). This is not a mistake, only a reminder that you need to add something. Icons show their names when you hover over them,
- marker 2 — the Components panel: you add elements to the scene from here,
- marker 3 — the Scene panel: this is where you build the exercise,
- marker 4 — the Scene elements list: everything that is already on the scene,
- marker 5 — the Inspector panel: the settings of the selected element.
What next: add an Image, add a Text or add a Component.
Project, engine and language in the start window
The start window has three more settings. You do not need to change anything at the beginning, but it is good to know what they mean. They are marked in the screenshot.
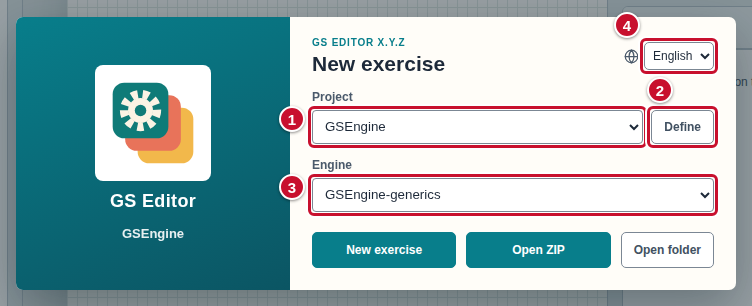
- Marker 1 — the Project list. A project is a set of settings shared by many exercises, including the scene size and the language. Every new exercise gets these settings from the chosen project. The built-in project is chosen by default.
- Marker 2 — the Define button opens the Project definition window. The built-in project is read-only (“Built-in project — read-only”), so to change its settings, click Create your own project based on it in this window. You can also add your own project with the + New project… entry on the project list.
- Marker 3 — the Engine list. The engine is the program that plays the finished exercise. Leave the one that is chosen by default.
- Marker 4 — the language of the editor's captions (its label is Interface language). It changes only the captions on buttons and panels, not the language of the exercise itself, and it does not delete anything from your work.
Name the exercise and check the default language
-
On the toolbar, click the sliders icon Exercise configuration (marker 1). A window with the same name opens.

-
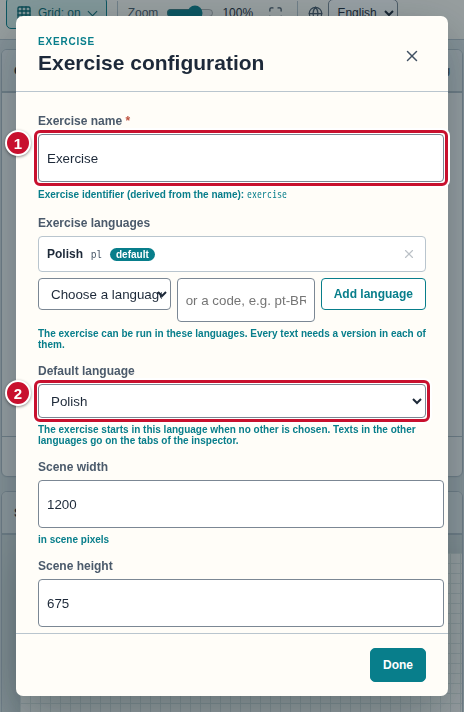
In the Exercise name field (marker 1), replace the default name with your own, for example “Fruit in a basket”. Under the field, the editor shows the line Exercise identifier (derived from the name): with the name written in a simpler way: in lowercase letters, without accents or special characters, with hyphens instead of spaces. In the screenshot, the name “Exercise” became “exercise”, and the name “Fruit in a basket” would become “fruit-in-a-basket”. The file you save the exercise to gets this name (for example fruit-in-a-basket.zip).
-
Look at the Default language list (marker 2). This is the language in which the exercise starts when no other is chosen, and in which you write the base texts. A new exercise starts with one language, the language of the project (in the screenshot, Polish, even when the editor itself is in English), so there is nothing to choose from yet. Under the list, the editor reminds you: “The exercise starts in this language when no other is chosen. Texts in the other languages go on the tabs of the inspector.” You add more languages in the section Exercise languages.
-
Click Done (marker 1). The window closes, and the name and the language are saved in the exercise.
In the same window you also set the size of the scene: the Scene width and Scene height fields. You enter the numbers in scene pixels, as the editor says (“in scene pixels”).
Exercise languages
An exercise can have texts in several languages, for example Polish and English. You can then run it in any of these languages. You add languages in the Exercise configuration window; how to translate the texts is described on the page Make an exercise in several languages.
-
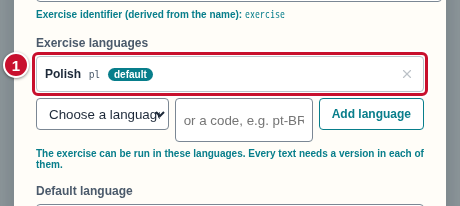
Open the Exercise configuration window (the sliders icon Exercise configuration, as in the previous section) and find the Exercise languages list (marker 1). At the beginning it has one language, marked “default”. Under the list, the editor explains: “The exercise can be run in these languages. Every text needs a version in each of them.”
-
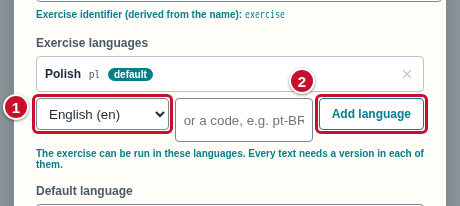
Under the list there is a selection box with the text “Choose a language…”. Click it and choose a language, for example English (marker 1 in the screenshot of the next step). The list shows the most popular languages; the ones the exercise already has are removed from it.
-
Click Add language (marker 2).
-
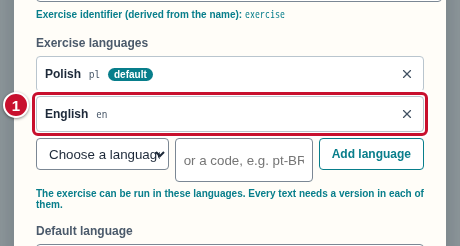
The new language appears on the list (marker 1), below the default language.
-
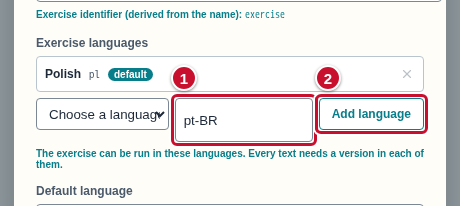
Your language is not on the list of popular ones? Type its code in the box next to it, with the hint “or a code, e.g. pt-BR” (marker 1): two lowercase letters of the language, for example de, and, if needed, after a hyphen two capital letters of the country, for example pt-BR.
-
Click Add language (marker 2). When the code has a wrong format or the language is already on the list, the editor shows a message under the list and adds nothing.
-
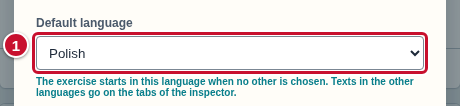
When the exercise has more than one language, from the Default language list (marker 1) choose the one in which the exercise should start and in which you write the base texts. The change does not delete or move anything: texts and files stay where they were.
-
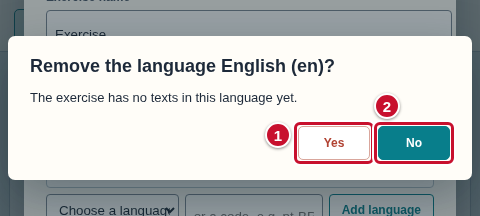
To remove a language, click the cross on the right side of its row. The editor asks if you are sure and tells you what disappears together with the language (texts and, if there are any, files). When the exercise has no texts in that language yet, it says: “The exercise has no texts in this language yet.”
-
Answer Yes (marker 1) to remove the language or No (marker 2) to keep it.
-
Click Done to close the window. When the exercise has more than one language, the stage bar shows language switches and the inspector shows tabs above the text fields (see Make an exercise in several languages).
Start again
When you open the editor again, the start window does not appear: the editor immediately restores your last work from this browser (the message “Local save restored” is then at the bottom of the scene). To start another exercise:
-
On the toolbar, click the sheet-with-a-plus icon New exercise (marker 1).

-
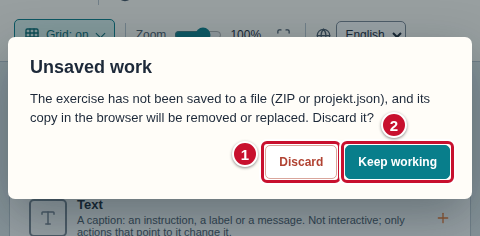
If the current exercise has not been saved to a file (as a ZIP or projekt.json), the editor asks Unsaved work: “The exercise has not been saved to a file (ZIP or projekt.json), and its copy in the browser will be removed or replaced. Discard it?” The answer Discard (marker 1) throws the exercise away. The answer Keep working (marker 2) leaves it in the editor, so you can save it first (see Save the exercise as a ZIP).
-
After you answer Discard, you see the start window and can follow the steps from the beginning of this page.
Common mistakes
- The start window does not appear. This is not an error: the editor restored your last work. Use the New exercise icon from the section Start again.
- Answering “Discard” to the question about unsaved work. Discarded work cannot be brought back. Before you start a new exercise, save the old one as a ZIP or projekt.json; then the editor does not ask at all.
- Changing the editor language instead of the exercise language. The choice in the start window and on the toolbar changes the captions of the editor. You set the languages of the exercise in the Exercise configuration window.
- A language cannot be removed. The cross is faded when the exercise has only one language — it always needs at least one. Add another language first or keep this one.
- After removing a language, its texts disappeared. Removing a language deletes its texts (and the asset files for that language) and cannot be undone. That is why the editor asks for confirmation with numbers — read them before you answer Yes.
- A language code was not added. The editor accepts only codes made of two letters (de) or two letters, a hyphen and two capital letters (pt-BR). It does not accept a name written in words (such as “english”) — choose the language from the list of popular languages.
- A warning about right-to-left writing. For languages such as Arabic or Hebrew the editor shows a warning that GS Engine does not support such writing yet. You can add the language, but the texts may be displayed incorrectly.
- An exercise name without letters or digits. The editor cannot create an identifier from it, and the problem counter shows the message: “The exercise name must contain letters or digits (the identifier is made from it).” Enter a name with letters or digits.